motionEyeOS Free Linux-Based Video Surveillance OS
motionEyeOS is a free, open-source Linux distribution designed to transform a single board computer like a Raspberry Pi into a powerful video surveillance system. It combines the motion software (responsible for motion detection and recording) with the motionEye web based interface, making it easy for users to set up and manage security cameras.
10k+
Users
Open Source
Always Free
24/7
Monitoring
Easy
Setup

motionEyeOS was created as a specialized distribution to integrate several open-source tools into one streamlined system. Instead of manually installing and configuring Linux, motion, and web interfaces separately, motionEyeOS packaged everything together into a ready-to-use OS.
- Initially popular among Raspberry Pi enthusiasts, it became the go-to solution for DIY home and small business security.
- Over the years, it gained a community of users who contributed improvements, bug fixes, and additional features.
- Although development activity has slowed in recent years, motionEyeOS remains widely used because of its simplicity and reliability for video surveillance projects.
Powerful Features
Everything you need to build a professional-grade video surveillance system
Works with USB cameras and Raspberry Pi Camera modules. Connect multiple cameras for comprehensive coverage.
Intelligent motion detection with customizable sensitivity. Get instant email notifications when motion is detected.
Save recordings to cloud services, network drives, or local storage. Automatic backup and archiving options.
Seamless file transfer with FTP, SFTP, and SMB protocols. Access your recordings from anywhere securely.
User-friendly web interface for quick setup and configuration. No command-line expertise required.
Set up recording schedules, enable/disable cameras automatically, and customize motion detection times.
Benefits of Using motionEyeOS
Cost-Effective Surveillance Solution
One of the biggest advantages of motionEyeOS is its affordability. Traditional CCTV systems often require expensive cameras, DVRs, and installation services. With motionEyeOS, you can build a complete surveillance setup using inexpensive hardware such as a Raspberry Pi and a USB or Pi camera module. This makes it an ideal choice for homeowners, small businesses, or hobbyists who want reliable security without spending thousands of dollars.
Open-Source and Customizable
motionEyeOS is completely open-source, which means the software is free to use and continuously improved by a community of developers. Being open-source also gives you the flexibility to customize it according to your needs. For example, you can tweak motion detection settings, integrate cloud storage, or modify the frontend interface. Unlike closed commercial systems, you’re not locked into proprietary software or services.
Easy Setup and User-Friendly Interface
Setting up motionEyeOS is straightforward, even for beginners. After flashing the OS onto an SD card, the system boots directly into a web-based interface where you can add cameras, configure storage, and manage settings. The motionEye frontend is designed to be clean and intuitive, making it easy for anyone—whether tech-savvy or not—to manage their video surveillance system.
Cross-Platform Access
motionEyeOS can be accessed from any device connected to your network. Whether you’re on a Windows PC, Mac, Linux system, Android, or iOS device, you can log in through a web browser and view live feeds, recordings, or adjust settings. This flexibility ensures that your surveillance system is not tied to one platform, making it highly convenient for households or businesses with mixed devices.
Remote Monitoring Capability
Another major benefit is the ability to monitor your cameras remotely. By setting up secure access through cloud services, SFTP, or port forwarding, you can check your live video feed or past recordings from anywhere in the world. This feature is particularly useful for travelers, business owners, or anyone who wants peace of mind when they are away from their property.
Hardware Requirements
Compatible Devices
- Raspberry Pi Boards:
- Raspberry Pi 3 Model B / B+
- Raspberry Pi 4 Model B
- Raspberry Pi Zero W
- Other Supported SBCs:
- Odroid boards (e.g., Odroid-C1, C2, XU4)
- Some older x86 computers
- Recommendation: Raspberry Pi 3 or 4 offers the best balance of performance, connectivity, and power consumption.
Camera Requirements
- USB Cameras:
- Most standard USB webcams are supported.
- Choose UVC (USB Video Class) compliant cameras for best compatibility.
- Raspberry Pi Camera Module:
- Official Raspberry Pi Camera Module (V1, V2, or HQ) works seamlessly.
- Great for compact builds.
- IP Cameras (optional):
- Some IP cameras can be integrated via RTSP/HTTP streams, though motionEyeOS works best with directly connected cameras.
Storage Options
- SD Card (for OS + local storage):
- Minimum: 8 GB (for testing or single-camera setup).
- Recommended: 16–32 GB Class 10 microSD (faster read/write).
- USB Drives / External HDDs:
- Useful for storing larger video archives.
- Format support: FAT, NTFS, ext4, etc.
- Network Storage (NAS / SMB Shares):
- Ideal if you want centralized storage for multiple devices.
- Cloud Storage:
- Google Drive or Dropbox supported for backups and remote access.
Network Requirements
- Ethernet:
- Recommended for stable, high-speed connections, especially with multiple cameras.
- Wi-Fi:
- Supported, but may cause delays or dropped frames if the signal is weak.
- Raspberry Pi 3/4 and Zero W have built-in Wi-Fi.
- Internet (Optional):
- Required if you want cloud uploads, remote access, or email notifications.
- For local-only surveillance, no internet is necessary—just a LAN connection.
How to Install motionEyeOS
Installing motionEyeOS is a straightforward process, similar to setting up other Raspberry Pi–based operating systems. Here’s a complete guide:
Downloading the motionEyeOS Image
- Visit the official motionEyeOS GitHub releases page.
- Select the correct image for your device (e.g., Raspberry Pi 3, Raspberry Pi 4, or other single-board computers).
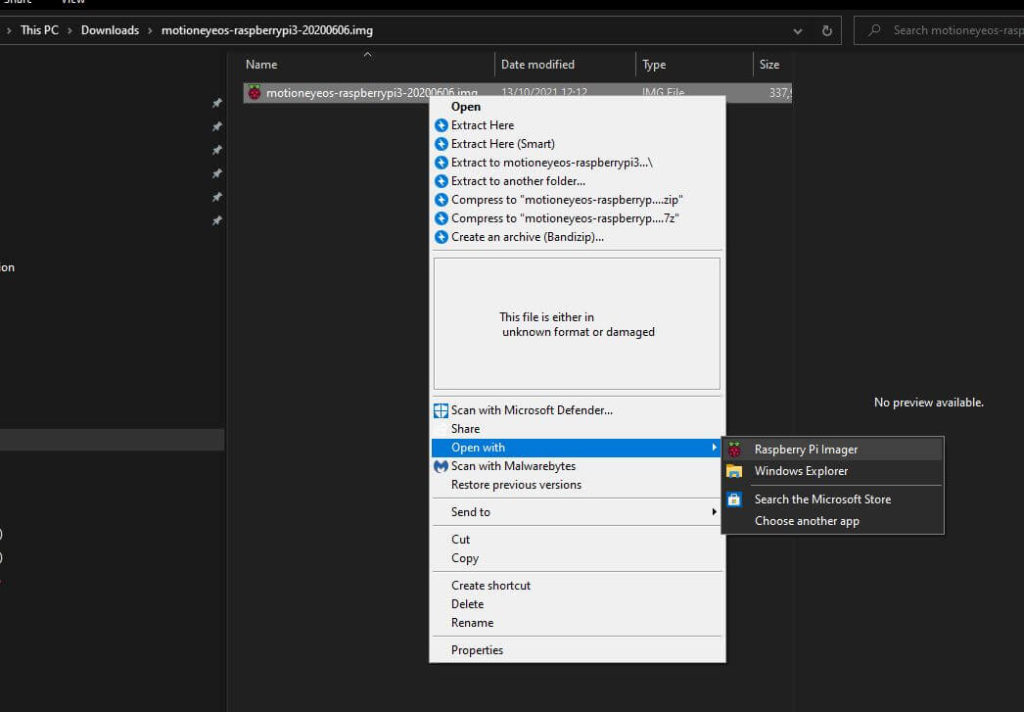
- Download the .img.xz file to your computer.
- Once downloaded, extract the .img file (you can use tools like 7-Zip or WinRAR).
Flashing Image to SD Card
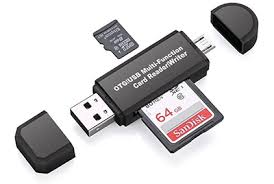
- Insert a microSD card (at least 8GB recommended) into your computer.
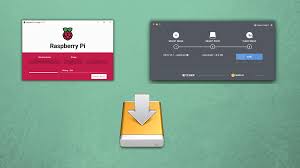
Use a flashing tool such as:
- balenaEtcher (Windows/Mac/Linux)
- Raspberry Pi Imager
- Select the extracted motionEyeOS .img file as the source.
- Choose your microSD card as the target.
- Start the flashing process and wait until it’s complete.
Booting the Raspberry Pi / SBC
- Insert the prepared SD card into your Raspberry Pi (or supported SBC).
- Connect a camera (USB webcam or Raspberry Pi Camera Module).
- Connect the device to power using the appropriate adapter.
- motionEyeOS will automatically boot for the first time (this may take a few minutes).
Initial Configuration (Wi-Fi / Ethernet Setup)
- If using Ethernet, your Pi will connect automatically, and you can skip Wi-Fi setup.
- If using Wi-Fi, you need to configure the wireless connection before booting:
- Open the boot partition of your SD card on your computer.
- Create a file named wpa_supplicant.conf.
Add the following content (replace with your actual Wi-Fi details):
					country=US
ctrl_interface=DIR=/var/run/wpa_supplicant GROUP=netdev
update_config=1

network={
    ssid="YourWiFiName"
    psk="YourWiFiPassword"
}
Accessing the Web Interface
- Once the Pi has booted and connected to your network, you can access motionEyeOS from any device on the same network.
- Open a browser and type the Pi’s IP address (e.g., http://192.168.1.10).
Default login credentials are:
- Username: admin
- Password: (leave blank by default)
- After login, you’ll see the motionEyeOS dashboard, where you can add cameras, set motion detection, configure storage, and more.
Configuring motionEyeOS
Once motionEyeOS is installed and running on your Raspberry Pi or single-board computer, the next step is to configure it for proper use. The configuration process is handled through the motionEye web interface, which is accessible from any browser on your local network. Below are the main areas you’ll need to set up:
Adding and Managing Cameras
- Go to the motionEyeOS web interface and log in.
- In the “Add Camera” option, you can select:
- Local Camera → for cameras connected directly to your device (USB or Pi Camera Module).
- Remote MotionEye Camera → if you want to stream from another motionEyeOS device.
- Network Camera → for IP cameras connected over your network.
- Once added, you can configure each camera individually, including resolution, frame rate, brightness, and overlays (like timestamps).
- Multiple cameras can be added, allowing you to build a multi-camera surveillance system.
Setting Up Motion Detection & Alerts
- MotionEyeOS uses the motion backend to detect movement.
- Under the “Motion Detection” settings:
- Enable or disable motion detection per camera.
- Adjust sensitivity levels to avoid false triggers.
- Set detection zones to monitor only specific areas of the video frame.
Alerts:
- Configure email notifications to be sent when motion is detected.
- Alerts can include snapshots or short video clips.
- You can also trigger custom commands/scripts for advanced automation (e.g., trigger a smart home light when motion is detected).
Configuring Storage Options
motionEyeOS offers flexible storage configurations for your media files:
- SD Card → Default storage on the device.
- USB Drive → Attach an external drive for larger storage capacity.
- Network Shares (SMB/NFS) → Save files directly to a shared folder on your network.
- Cloud Uploads → Configure automatic upload to Google Drive or Dropbox.
- Storage settings also allow you to define retention policies, such as keeping recordings only for a specific number of days or until space is full.
Securing the System (Passwords, SFTP/FTP Access)
Since motionEyeOS is often used for remote surveillance, security is critical:
Password Protection:
- By default, the admin account has no password → set a strong password immediately.
- You can also create separate user accounts with limited permissions (e.g., view-only access).
SFTP/FTP Access:
- motionEyeOS includes built-in FTP and SFTP servers for accessing your files.
- Secure your FTP/SFTP with strong credentials.
- If accessing remotely, use SFTP (encrypted) instead of plain FTP.
Network Security:
- Change default ports if exposing motionEyeOS to the internet.
- Use a VPN for remote access instead of port forwarding to reduce security risks.
Who Should Use motionEyeOS?
motionEyeOS is designed as a lightweight yet powerful surveillance solution, making it ideal for different types of users. Here’s a breakdown of who can benefit most from it:
Home Security Users
If you want an affordable home surveillance system without paying for expensive CCTV setups, motionEyeOS is a great choice.
- Works with inexpensive USB or Raspberry Pi cameras.
- Provides live streaming and motion detection alerts.
- Allows storage on SD cards, external drives, or even cloud services.
- Easy access from mobile devices or computers for monitoring your home remotely.
Small Business Owners
Small businesses often need surveillance but may not have the budget for professional-grade security systems. motionEyeOS offers:
- Multiple camera support for monitoring different areas (shops, offices, warehouses).
- Email notifications when motion is detected (useful for after-hours security).
- Network and cloud storage options for keeping evidence safe.
- Easy web interface for staff or managers to access footage.
DIY and Hobbyist Projects
Tech enthusiasts and makers love motionEyeOS because it’s:
- Open-source and customizable.
- Lightweight and runs on single-board computers like Raspberry Pi.
- Great for experimenting with IoT, home automation, or smart security systems.
- Can be integrated with other tools like Home Assistant for advanced automation.
Educational Purposes (Learning Linux & Surveillance Setups)
motionEyeOS isn’t just for practical use it’s also a great educational tool.
- Students and beginners can learn Linux basics by configuring the OS.
- Helps in understanding video streaming, file storage, and networking.
- Can be used in schools, colleges, and maker labs as a project.
- Encourages learning about cybersecurity and secure remote access.
FAQ's
What is motionEyeOS?
motionEyeOS is a Linux-based operating system that transforms single-board computers like the Raspberry Pi into a video surveillance system. It uses motion as the backend and motionEye as the frontend.
Is motionEyeOS free to use?
Yes, motionEyeOS is completely free and open-source software.
Which devices are compatible with motionEyeOS?
It works with most Raspberry Pi models and other single-board computers. It supports USB cameras and the Raspberry Pi Camera Module.
Can I connect multiple cameras to motionEyeOS?
Yes, you can add and manage multiple cameras within the motionEyeOS web interface.
What file formats does motionEyeOS use for recordings?
- Images: JPEG
- Videos: AVI
How does motion detection work in motionEyeOS?
motionEyeOS automatically detects movement in the camera feed. When motion is detected, it can record, save files, and send email notifications.
Can I schedule recordings with motionEyeOS?
Yes, you can configure recording schedules to capture footage only at specific times.
What storage options are supported?
You can store recordings on an SD card, USB drive, SMB network share, or upload directly to cloud services such as Google Drive and Dropbox.
Can I access my media files remotely?
Yes, you can access files via SMB network shares, built-in FTP server, or SFTP server. You can also configure remote access through your router.
Does motionEyeOS work with Wi-Fi?
Yes, motionEyeOS supports both Ethernet and Wi-Fi connections for flexible networking.
How do I install motionEyeOS on a Raspberry Pi?
You need to download the motionEyeOS image, flash it to an SD card, insert it into your Raspberry Pi, and boot the device. Configuration is done through the web interface.
Can motionEyeOS upload videos to cloud storage?
Yes, it supports cloud upload to Google Drive and Dropbox.
Is motionEyeOS secure for remote access?
Yes, but you should set strong passwords, use SFTP, and configure secure network access to protect your system.
How do I update motionEyeOS?
You can update motionEyeOS through the web interface by applying available updates or manually flashing a newer version.
Can I use motionEyeOS without internet?
Yes, motionEyeOS can work offline for local storage and access. Internet is only required for remote monitoring or cloud uploads.
What happens if the SD card gets full?
motionEyeOS can automatically delete old recordings to free up space, depending on your configuration.
How many cameras can motionEyeOS handle?
It depends on the hardware performance of your single-board computer and available storage. Higher-end models can handle more cameras.
Can I use motionEyeOS for business surveillance?
Yes, many small businesses use motionEyeOS as a cost-effective CCTV solution.
Does motionEyeOS support live streaming?
Yes, you can view live streams of connected cameras through the motionEyeOS web interface.
Does motionEyeOS support live streaming?
Popular alternatives include ZoneMinder, Shinobi, and Frigate, but motionEyeOS is known for its simplicity and lightweight design.